


Agricultural Literacy Curriculum Matrix
Lesson Plan
Little Red Hen
Grade Level
Purpose
Students use the story The Little Red Hen to investigate wheat production and bread making. Students thresh their own wheat and grind it into flour to make bread. Grades K-2
Estimated Time
Materials Needed
Activity 1:
- The Little Red Hen story
- 2 containers of wheat seeds
- Wheat stems (Wheat stems can be obtained from a local farmer or Wheat Bundles are available for purchase. These will also be used in Activity 3.)
- Container of wheat flour
- Loaf of wheat bread
- Paper plates, 1 per student
- Popsicle sticks, 1 per student
- Art supplies (tissue paper, construction paper, chenille stems, feathers, etc.)
Activity 2:
- Clear plastic cups, 1 per student
- Permanent markers
- Potting soil
- Small gardening trowels or spoons
- Wheat seeds (hard red wheat seeds can be purchased from the grocery store)
- Water spray bottles
Activity 3:
- From Wheat to Bread by Kristin Thoennes Keller
- Harvesting Wheat video
- Stem of wheat, 1 per student (Wheat stems can be obtained from a local farmer, or Wheat Bundles are available for purchase from agclassroomstore.com)
- How To Do It! Threshing or Removing the Seed handout
- Wheat Grinder
- A hand-cranked wheat grinder is preferable because it will allow each student to participate in the process, but an electric grinder will also work.
- A Wheat Grinder Kit is available for purchase from agclassroomstore.com
- From Seed To Harvest activity sheet
Activity 4:
- It Takes a Team video
Vocabulary
chaff: the debris that is separated from the seed when grain is threshed
combine: a machine that cuts crops and separates the seeds from the rest of the plant, combining the harvesting, threshing, and winnowing processes
forage: bulky food such as grass or hay typically consumed by livestock
thresh: to separate the seeds of crops like wheat, corn, or dry beans from the plant
wheat: a cereal plant grown in temperate climates, the grain of which is ground to make flour for bread, pasta, pastry, etc.
winnow: to remove (the unwanted coverings of seeds) from grain using a current of air
Did You Know?
- Wheat is a member of the grass family that produces a dry, one-seeded fruit commonly called a kernel.1
- One bushel of wheat contains approximately one million individual kernels.1
- In the United States, one acre of wheat yields an average of 40 bushels of wheat.1
- Kansas is the number one state in flour milling (grinding the seeds into flour) in the United States.1
Background Agricultural Connections
Wheat is a type of grain. It is useful as a livestock feed, but most wheat is used as human food. It is nutritious, easily stored and transported, and easily processed into a variety of foods. Unlike any other plant-derived food, wheat contains gluten protein that causes leavened dough to rise, forming very small gas cells that hold carbon dioxide during fermentation. This gluten and fermentation process produces light-textured bread. Bread and other wheat products are high in carbohydrates and contain valuable protein, minerals, and vitamins.
Types of wheat are grouped based on the season in which they are planted and whether their grain is hard or soft, red or white.The five major types of wheat grown in the United States are: hard red winter, hard red spring, soft red winter, white, and durum. Hard-red winter wheat and hard-red spring wheat are the most popular types of wheat in the United States. This wheat is ground into flour that is used for making bread. Another class of wheat, durum wheat, is used in macaroni, spaghetti, and other pasta products. Soft-red winter and soft-white wheats are grown in the eastern part of the United States. These types of wheat have less protein. They are used to make flour for cakes, biscuits, pastries, and other breakfast foods.
To prepare the soil for planting wheat, a farmer drives a tractor that pulls a plow through the fields. The plow turns the soil over and kills the weeds. A disk harrow is then connected to the tractor. The disk harrow breaks the soil down into smaller pieces. When the soil is ready for planting, the farmer uses a grain drill to plant the wheat seeds.
Spring wheat is planted in April or May and harvested in August or September. Winter wheat is planted in August, September, or October. It begins to grow, goes dormant in the winter, and then continues to grow once the snow melts and the soil warms in the spring. Winter wheat is harvested in May, June, and July.
The wheat we eat comes from the seeds of the wheat plant. To harvest the seeds, the wheat must be cut, threshed, and winnowed. A large machine, called a combine, is used to cut the wheat plant and separate the seeds (the grain) from the stem and the protective outer hull. The action of shaking the seeds loose is called threshing. Winnowing separates the seeds from the rest of the plant. The grain is collected, and the rest of the plant, referred to as the chaff, is used for animal bedding or forage. A combine is a very expensive piece of equipment, so many wheat farmers hire a custom harvester. Custom harvesters take their combines across the country during the wheat harvest, going from farm to farm cutting wheat.
Once the wheat seeds are harvested, they are loaded into trucks and driven to grain elevators where they are weighed, tested, and stored. The wheat seeds are then transported to a mill to be ground into flour.
Engage
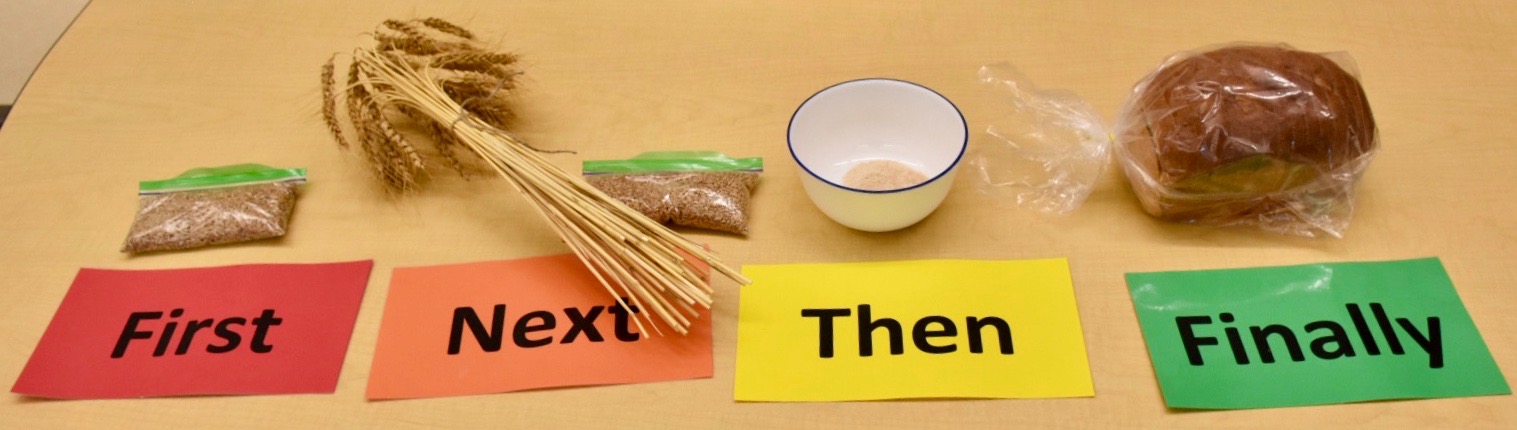
- Show the class stalks of wheat, wheat seeds, and flour. Ask if they can identify each item and how the items are related.
- Explain that each item represents a step in the process of making flour. Wheat grows in a field and produces tiny seeds. The seeds are then removed and ground into flour.
- Ask the students to list some of the foods that can be made using flour. (bread, cake, cookies, brownies, pasta, crackers, etc.)
Explore and Explain
Activity 1: Story of the Little Red Hen
- Read The Little Red Hen to the students.
- Place the wheat seeds, wheat stems, flour, and a loaf of bread in random order on a table for the students to see. Discuss the steps the little red hen followed to make her bread.
- Have the class help create a timeline of the story by placing the props in the correct order. Use the words first, next, then, and finally to review the story. (First, the little red hen planted the seeds. Next, she harvested the wheat. Then, she took the wheat kernels to the mill to be ground into flour. Finally, she used the flour to make bread.)
- Place students in groups of four. Assign each student in the group a different character from The Little Red Hen. Have them create a paper plate puppet for their character to be used in a puppet show retelling of the story.
- Allow time for each group to practice and perform their puppet show retelling the story for the class.

Activity 2: Growing Wheat
- Ask the students, "Who grows the wheat that is ground into flour and sold at the grocery store?" (farmers) Explain to the students that while the little red hen probably grew a small patch of wheat, most wheat farmers grow large amounts of wheat in big fields.
- Explain that wheat is a plant. Ask the students, "What do plants need to grow?" (Plants need light, water, air, and nutrients to grow.)
- Tell the students that, just like the little red hen, they will grow a small patch of wheat to better understand how farmers must meet the needs of plants when growing crops.
- Provide students with clear plastic cups,
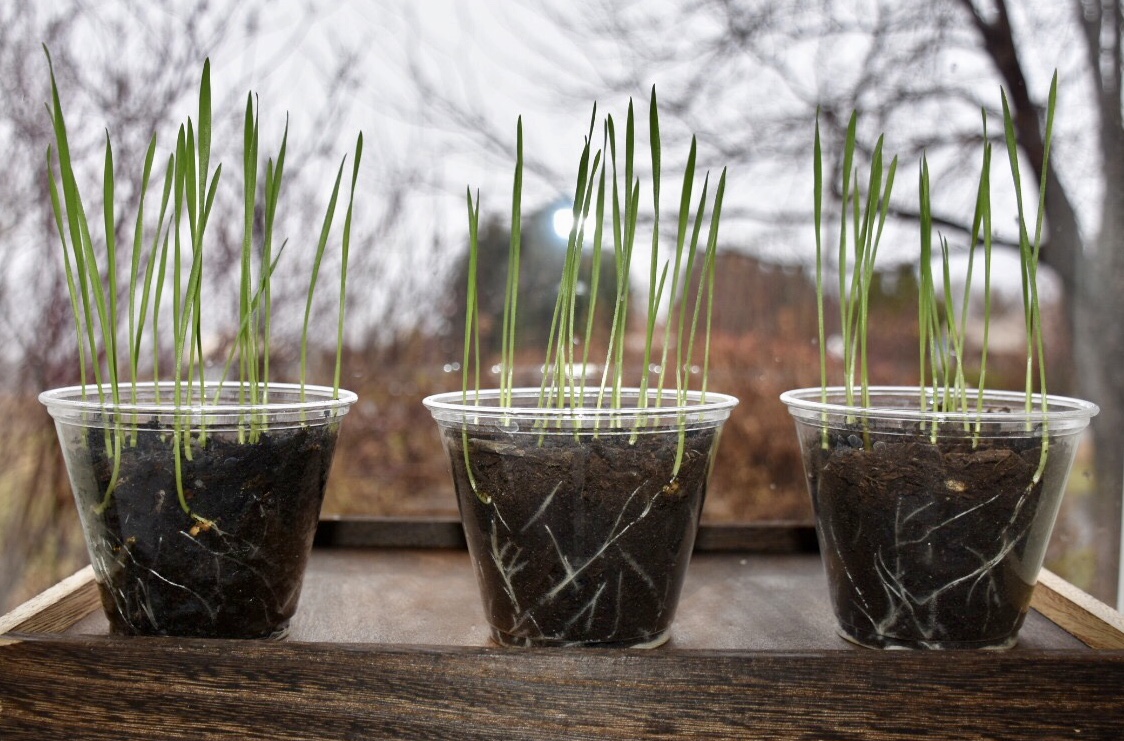 permanent markers, a container of potting soil with small gardening trowels or spoons for scooping, and wheat seeds. Instruct them to write their name on a cup and add potting soil until the cup is 3/4 full. They should put about 15 wheat seeds on top of the soil. Encourage the students to place about 5 seeds around the sides of the cup to allow for observation of the germination process and root growth. Add a thin layer of soil on top of the seeds.
 - Remind students that plants need light, water, air, and nutrients to grow. Ask the students, "How can we help the wheat plants get what they need? (We can put the cups by the window for light from the sun. We can water the plants. The plants will get nutrients from the soil and air from the classroom.)
- Show the students a cup of dry soil, a cup of soil with too much water, and a cup of soil with the right amount of water. Explain to the students that plants need water, but too much water can be harmful. They will need to check the soil in their cups every day and add more water when the soil begins to dry. Provide the students with water spray bottles and instruct them to spray the soil with water before placing their cups by a window. It will take 3-5 days for the wheat seeds to sprout.
- After the wheat begins to grow, ask the students the following questions:
- How many days did it take for the wheat seeds to sprout?
- What do the wheat plants look like?
- What do the plants need to grow?
Activity 3: From Wheat to Bread
- Use the book From Wheat to Bread by Kristin Thoennes Keller to describe and illustrate the steps taken to transform wheat into bread.
- Use the video Harvesting Wheat to show a combine harvester in action. The combine performs three actions: cutting, threshing, and winnowing.
- Give each student a wheat stalk. Help students identify the stalk and the head of the plant. Explain that inside the head of the wheat plant are wheat seeds, just like the seeds they planted in Activity 2.
- Ask students to predict how many seeds are in their head of wheat and record their prediction.
- Use the instructions provided in the How To Do It! Threshing or Removing the Seed handout or the Wheat Grinding Tutorial video to model for the students how to thresh wheat by hand. Then, help them complete the threshing process with their wheat stems. When they are finished, they should each have a small pile of wheat seeds, a pile of chaff, and the remaining wheat stalk.
- Ask students to count the seeds they removed from their wheat stems.
- Were their predictions accurate?
- Would they have enough wheat to make a loaf of bread? (It takes about four cups of flour to make a loaf of bread.)
- Have each student place their seeds in a wheat grinder. If you use a hand-cranked grinder, allow each student to turn the crank. If you use an electric grinder, place all of the seeds in the grinder and turn it on. Show students the whole-wheat flour.
- Ask students to describe the similarities and differences between what they have experienced, what the little red hen did in the story, and what farmers do.
- Complete the From Seed to Harvest activity sheet as a class or provide each student with a copy to complete individually.
Activity 4: It Takes a Team
- Discuss the concept of cooperation and teamwork. Ask the students to list some examples they've observed from home or in the classroom.
- Discuss with the students what kinds of responsibilities they had when caring for the wheat plants they grew in Activity 2. Remind the students that they needed to make sure the plants were getting enough light, water, nutrients, and clean air.
- Explain that wheat farmers grow large fields of wheat and have many responsibilities. Some wheat farmers do all the jobs themselves, but most depend on help from a whole community of workers. Tell the students that they are going to watch a video about how these workers use cooperation and teamwork to get the job done. Show the class the It Takes a Team video.
- After viewing the video, ask the students the following discussion questions:
- What responsibilities did the wheat farmers have? (Wheat farmers prepare the soil, plant the seeds, and make sure the needs of the plants are being met. When the wheat is ready to be harvested, the farmers must cut, thresh, and winnow the wheat before it can be transported to the mill to be ground into flour. At different times, a wheat farmer may be a machine operator, a mechanic, a salesperson, a businessperson, a banker, a bookkeeper, or a manager.)
- What if every farmer had the same problem as the little red hen, with no one willing to help? (It would be very difficult for a farmer to grow large fields of wheat on their own.)
- Who did the wheat farmers hire to help harvest the wheat? (custom harvesters)
- What is the name of the big machine used to harvest wheat? (combine)
Elaborate
-
Read different versions of The Little Red Hen. As a class, make a Venn diagram to show how the stories are alike and different.
-
Make bread or tortillas using flour that the students grind in class with the hand or electric grinder.
Note: Purchase hard red wheat from the grocery store to grind into flour and use for this activity. Using the wheat the students remove from the wheat stem is not recommended.
-
Create a sensory retelling station where students can retell the story of The Little Red Hen. Include a bin of wheat seeds, wheat stalks, a bin of wheat flour, characters from The Little Red Hen, and clay (to represent the bread dough).
Evaluate
After conducting these activities, review and summarize the following key concepts:
- Wheat is grown by farmers.
- After wheat is harvested, it is ground into flour. Flour is used to make many different food products.
- Farmers use different tools and machinery to make their work easier. The combine is a machine used to harvest wheat.
Acknowledgements
Parts of the Background Agricultural Connections section and Activity 3 from Minnesota Agriculture in the Classroom.
Recommended Companion Resources
- A Seed is Sleepy
- A True Book: Wheat
- Amazing BREAD Processing- How It's Made Inside a Factory
- Bread Comes to Life
- Bread Comes to Life
- Bread Lab!
- Bread in a Bag
- Bread is for Eating
- Bread, Bread, Bread
- Combines: with Casey & Friends
- Eat Happy Project video series
- Everybody Bakes Bread
- From Wheat to Bread
- Fry Bread: A Native American Family Story
- Grains Flowchart
- Grains on MyPlate
- Hero for the Hungry: The Life and Work of Norman Borlaug
- How Food gets from Farms to Store Shelves
- Pancakes for Breakfast
- Seed, Soil, Sun: Earth's Recipe for Food
- The Boy Who Changed the World
- The Little Red Hen
- The Little Red Hen (Makes a Pizza)
- The Tiny Seed
- Up Close Experience: Combines
- Wheat Bundle
- Wheat Grinder
Author
Organization
 |
We welcome your feedback! If you have a question about this lesson or would like to report a broken link, please send us an email. If you have used this lesson and are willing to share your experience, we will provide you with a coupon code for 10% off your next purchase at AgClassroomStore. |